From Jar to Rack: What Happens When Fodder Starts to Sprout
This post contains an Amazon affiliate link. If you make a purchase through that link, T-Bone’s Place may earn a small commission at no additional cost to you. As an Amazon Associate we earn from qualifying purchases.
Table of Contents:
1. Where We Left Off
2. Waiting for the Little White Nubs
3. How Much Seed Do We Actually Need?
4. The First Drain and Rinse
5. Why Drainage Matters
6. Moving from Jar to Rack
7. The Blackout Stage
8. Our Very Unfancy Setup
9. What We Are Watching For
10. What Could Go Wrong?
11. What We Will Adjust Next Time
12. The Next Real Test: Will the Rabbits Eat It?
1. Where We Left Off
This is the beginning of the fodder project at T-Bone’s Place, not the polished final version. Right now, some of our photos may still look like jars of soaking seed and tiny root tails instead of lush green trays, but that is the honest part of the process. Every tray of fodder starts somewhere, and this is where ours begins.
After about ten hours in water, the soaked seed gets drained through the sprouting lid. Then we wait for those little white nubs to show up, the tiny root tips that tell us it is time to head to the rack.
As the wheat grows, we will keep documenting it. The goal is not to make this look perfect on day one. The goal is to learn what works, spend less where we can, and show the real process from seed to sprout to fodder mat.
2. Waiting for the Little White Nubs
We are working with a lot of unknown variables with this batch, and that is because we chose hard white wheat berries.
The industry standard for fodder in rabbitries is generally barley because of the thick, woven mat it tends to make. Our wheat berries may offer strong nutritional value, but the way wheat sprouts is different. It grows more like wheatgrass. The roots are more delicate, and getting a mat that we can lift, cut, and transfer is going to be more challenging.
We are up to the challenge.
At this stage, we have two to three days of rinsing and draining on a schedule before those first magical little white root tails begin to appear. These are the days when we have to be diligent. The goal is to keep the wheat moist and active without giving mold, bacteria, or rot a chance to move in.
3. How Much Seed Do We Actually Need?
Our first order of business was figuring out how many wheat berries we would need compared to barley for the 24-inch x 24-inch fodder rack we made.
From what we found, a rack our size would usually take about 3 to 3 1/2 cups of barley kernels. For this first wheat test, we soaked approximately 1 1/4 cups of hard white wheat berries, maybe a little more. I did not measure it perfectly.
Wheat berries are smaller when they begin life, but they should not be underestimated. Since they are smaller than barley kernels, more of them pack into the same measuring cup. Roughly speaking, one cup of wheat berries can hold about 50% more individual seeds than one cup of barley.
That is one of the reasons we started with only about a cup and a quarter. It may sound light at first, but there are more little seeds in there than it looks like.
4. The First Drain and Rinse
We started by putting those beautiful berries into a half-gallon mason jar and topping the jar with a stainless-steel sprouting lid. The lid has a fine mesh top for straining, which makes this part much easier.
Then we added tepid, filtered water until the jar was about half full and swished the berries around to rinse them. That first rinse helps remove chaff, floaters, broken bits, and any dusty ick that came along with the grain. Pour that water down the drain, do it again, and then refill the jar with filtered water, if you have it, until the water sits about two to three inches above the seed.
Set the jar aside for the next ten to twelve hours. Not in the sun, not in the fridge, just somewhere on the counter and out of the way.
It is a lot like sourdough.
After that initial soak, the berries should be swollen and expanded. The sprouting has begun.
Now it is time to rinse them again and drain them. Be gentle. Do not shake them hard. They are open now, waking up, and becoming more delicate. Rinse them, then use the built-in kickstand on the lid to prop the jar at an angle near the sink so it can drain for the next 12 hours.
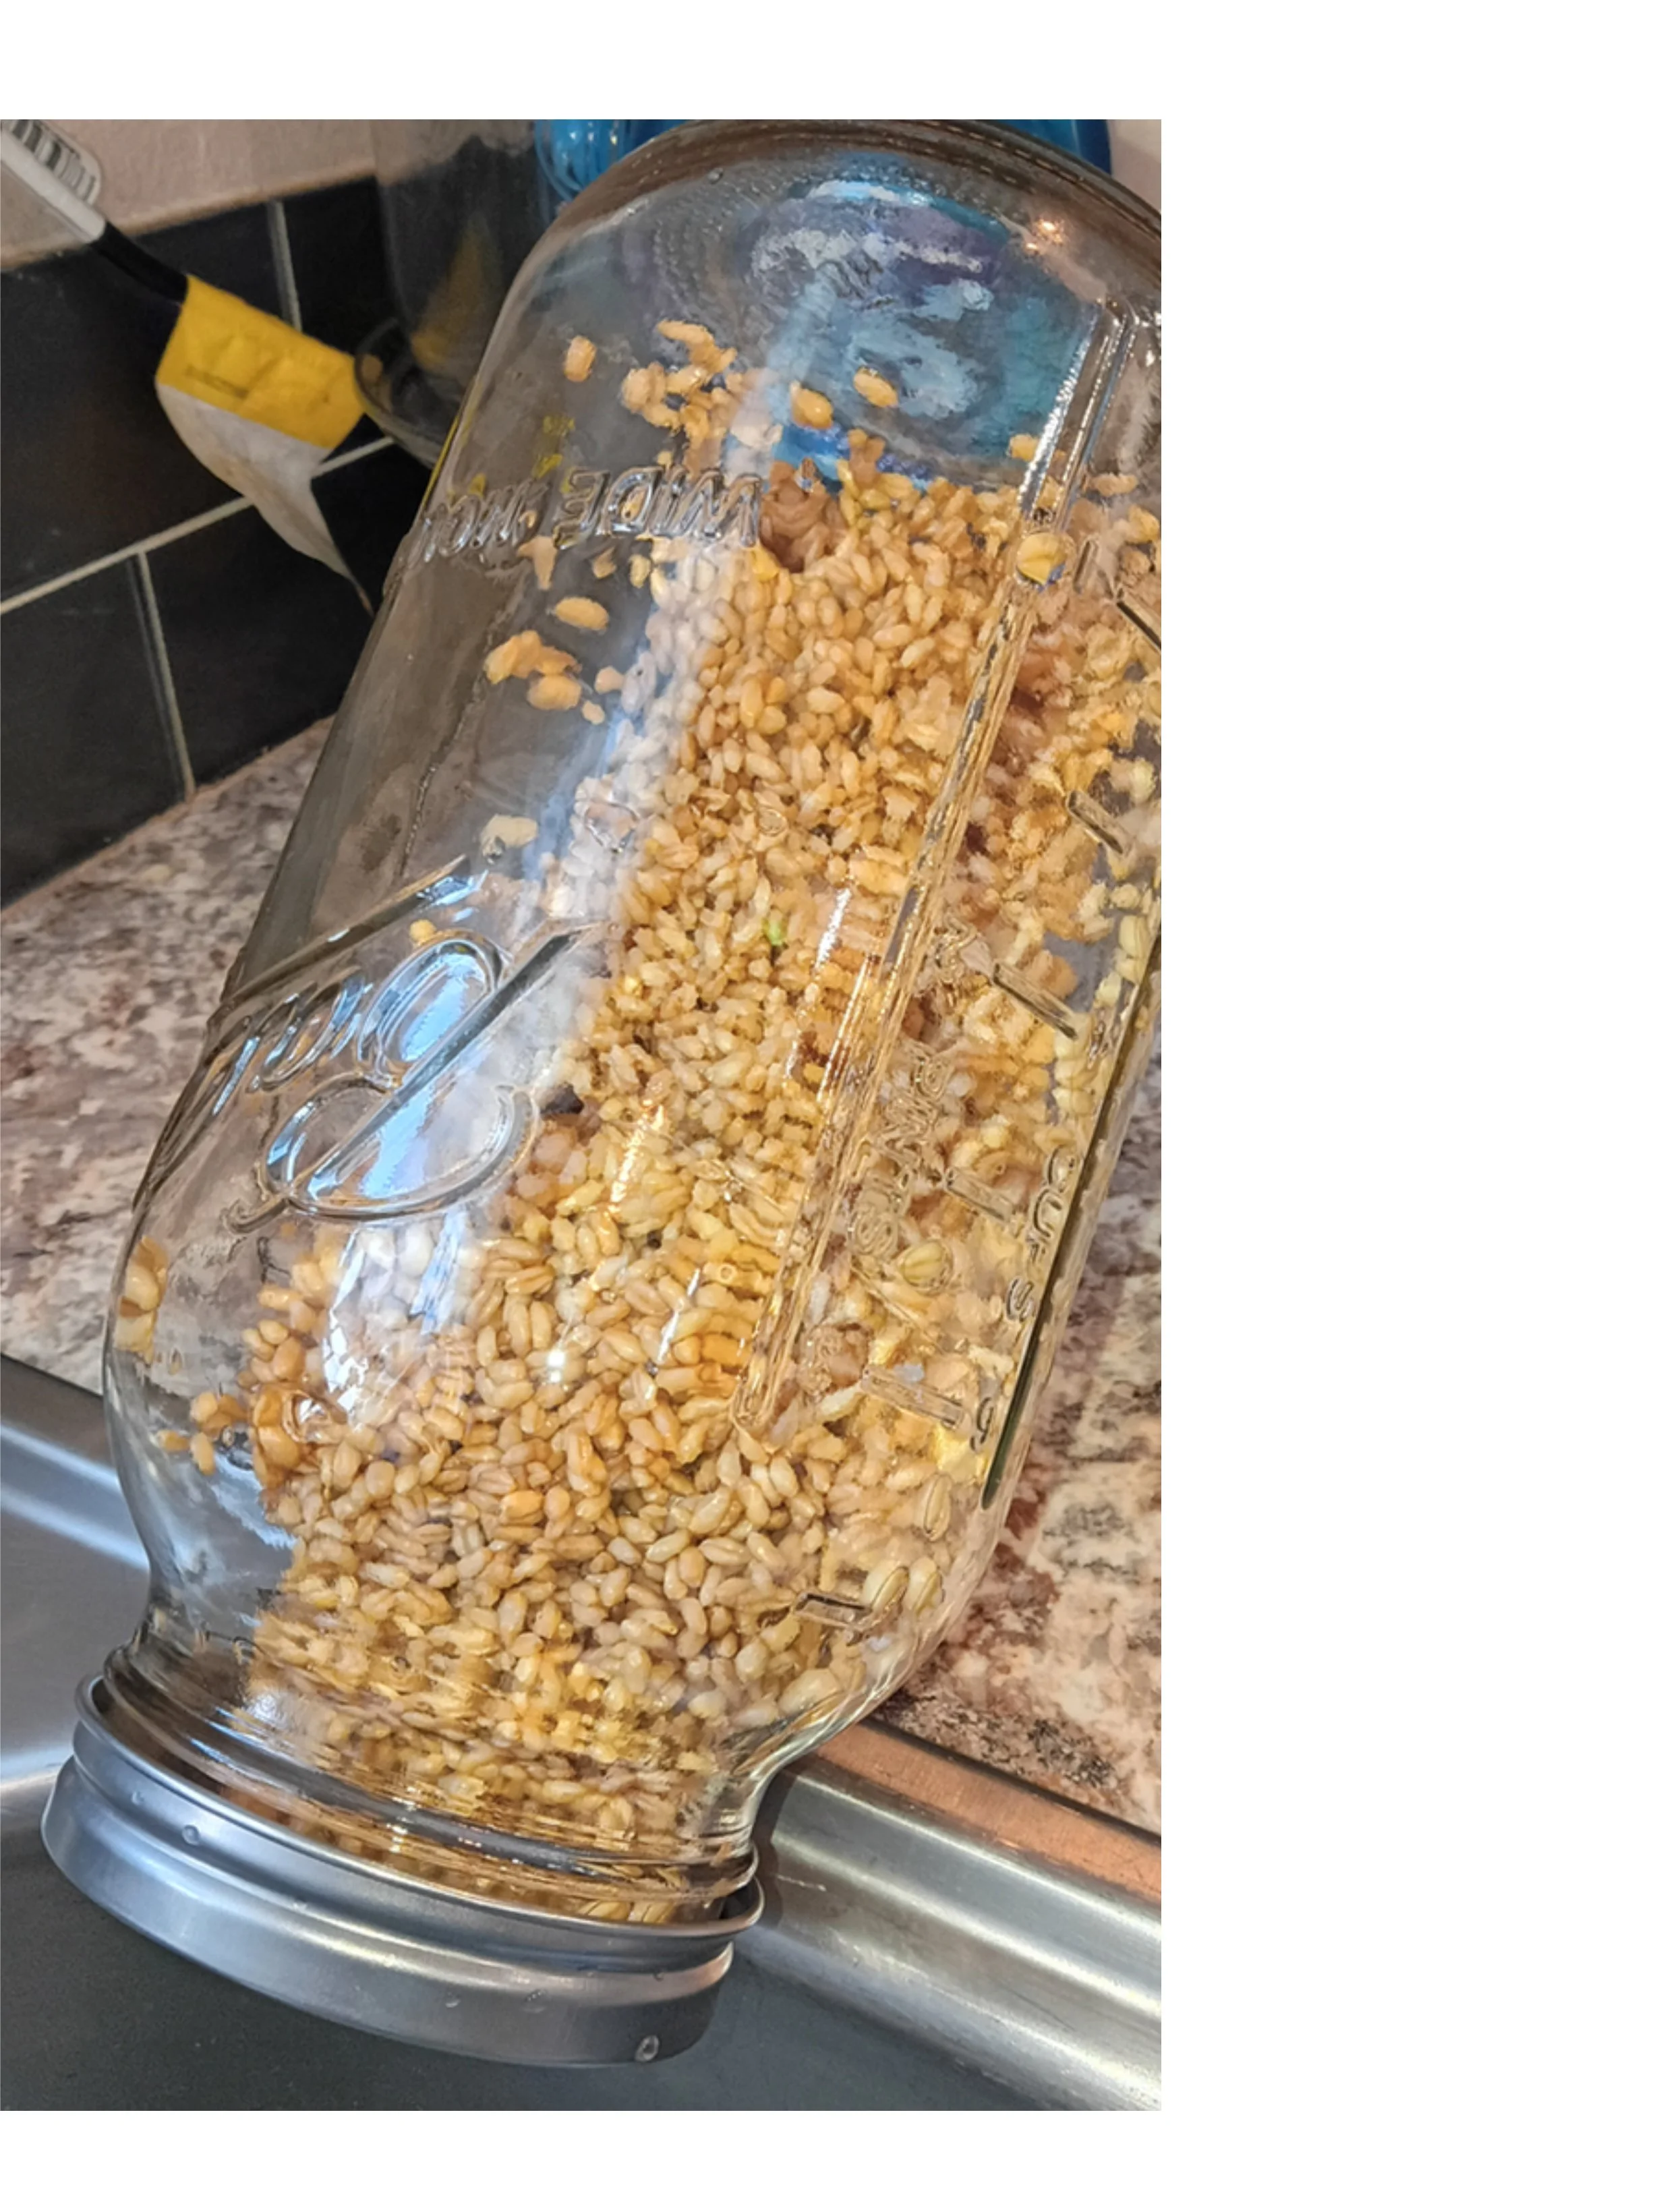
The First Drain & Rinse
Every fodder mat starts somewhere. Ours started in a half-gallon mason jar by the sink.
Congratulations. You have officially started the rinse-and-drain dance.
5. Why Drainage Matters
This process of rinsing and draining at an angle is really important over the next two to three days.
We are basically jump-starting germination by creating the right conditions: moisture, warmth, oxygen, regular rinsing, and good drainage. The trick is keeping the berries moist enough to sprout without leaving them wet enough to rot.
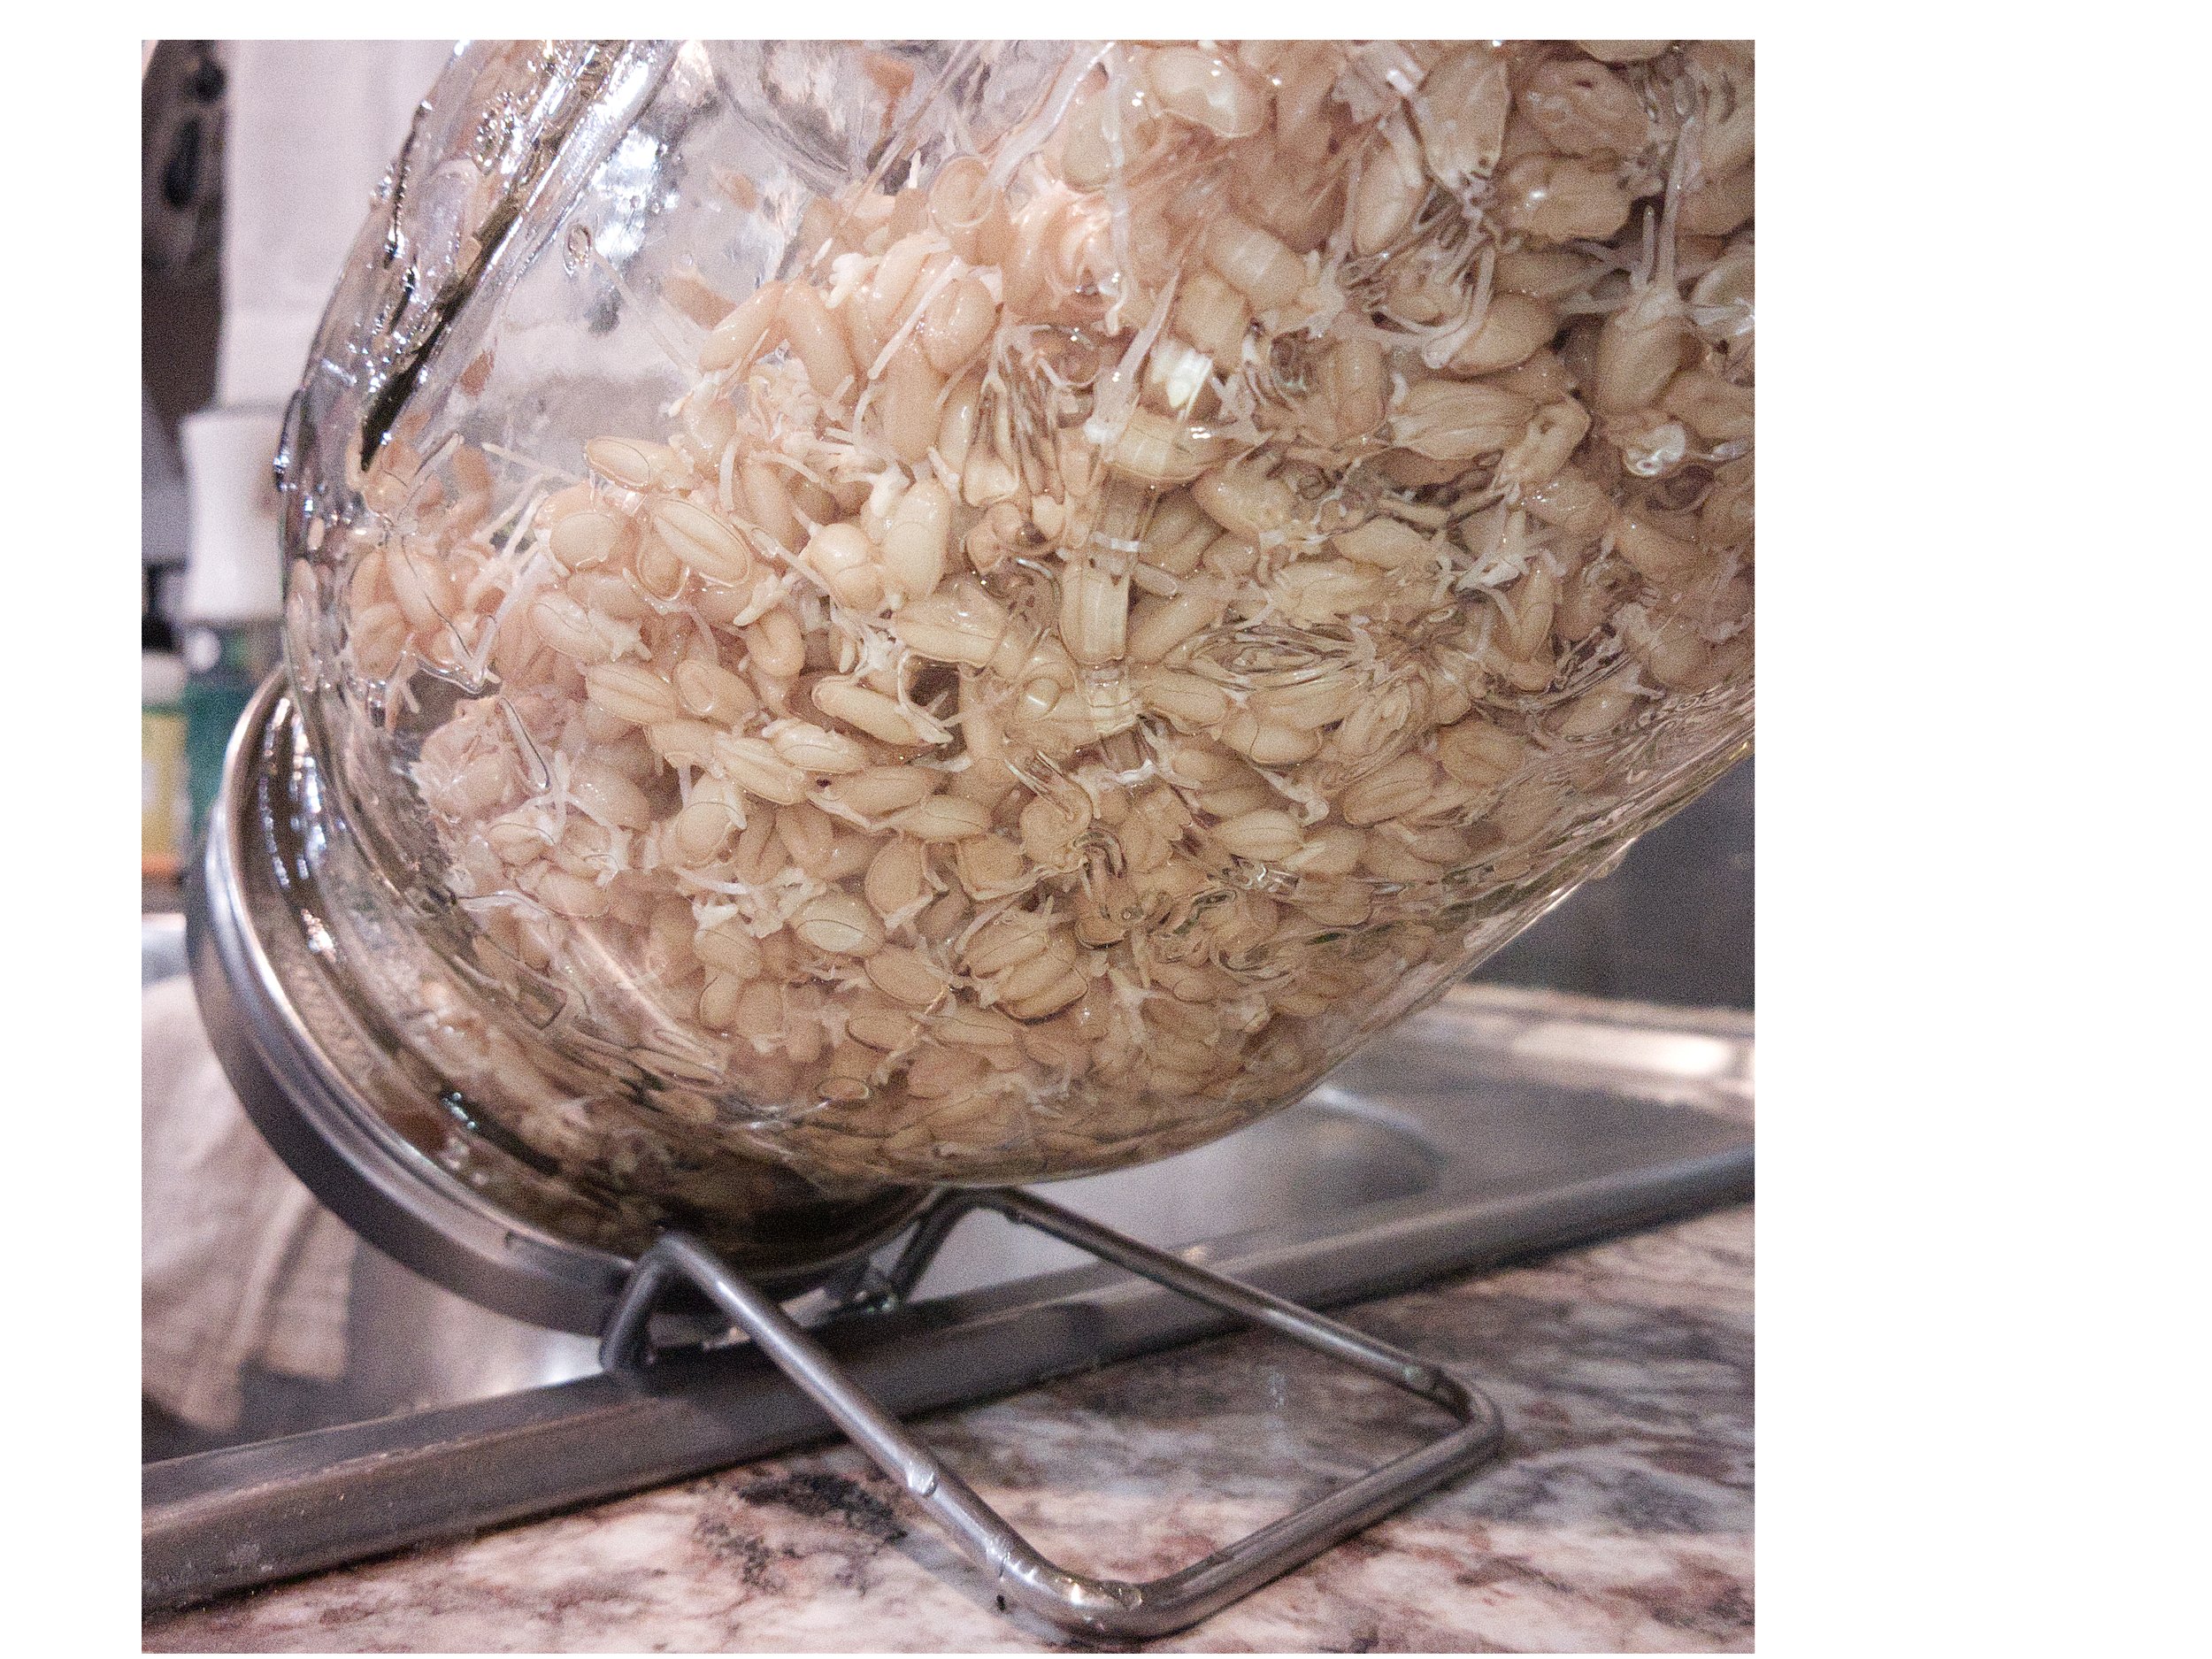
The right tools make all the difference
The jar propped at an angle so the wheat can drain without sitting in water. The stainless steel lids can be purchased here.
Drainage is one of the most important parts of the whole process. The wheat needs steady moisture, but it cannot sit in water. If it dries out completely, that batch is done for. If it stays soaked, it can sour or rot instead of sprouting.
It is a fine line.
The jar is basically our tiny little sprouting chamber. Not a sealed biodome, because the seed still needs air and drainage, but it does give the wheat that damp, protected environment where it can wake up and start pushing out those little white root tails.
6. Moving from Jar to Rack
This is the step that requires a delicate hand.
The goal is to glide, float, and nestle the swollen berries onto their new home on the stainless-steel screen we attached to the fodder rack. By this point, those berries have delicate little root tails, and we do not want to mash, smush, or snap them off.
This is not a schlop-and-plop situation.
First, wet the screen thoroughly with cool water. That gives the young sprouted wheat a little slip-and-slide so it can drift and settle instead of dragging across a dry surface.
Then add a little water back into the jar too. Just enough to loosen the wheat and help it swoosh around gently. Once the lid is removed, you can ease the sprouted berries out onto the rack with the help of that water.
Kind of like throwing the baby out with the bathwater.
Gently though.
Use your fingers, a silicone spatula, and water to help the wheat settle into a single smooth layer across the screen. The goal is not perfection. The goal is an even enough layer that the berries can root, breathe, drain, and grow.
7. The Blackout Stage
This stage is short, but it matters.
The goal is to give the roots a chance to grab hold before the shoots start reaching for the sky. We are looking for that “chia carpet” of roots.
Since we are using wheat instead of barley, we know the root bed may look different. Barley is known for making a thick, woven mat. Wheat tends to grow more like wheatgrass, so we are watching to see if it can create enough of a root base for us to lift, cut, and carry to the rabbits in chunks.
For our blackout stage, we used one of the lids from the 27-gallon totes we grow in on the other side of the greenhouse. We simply laid it across the top of the fodder rack.
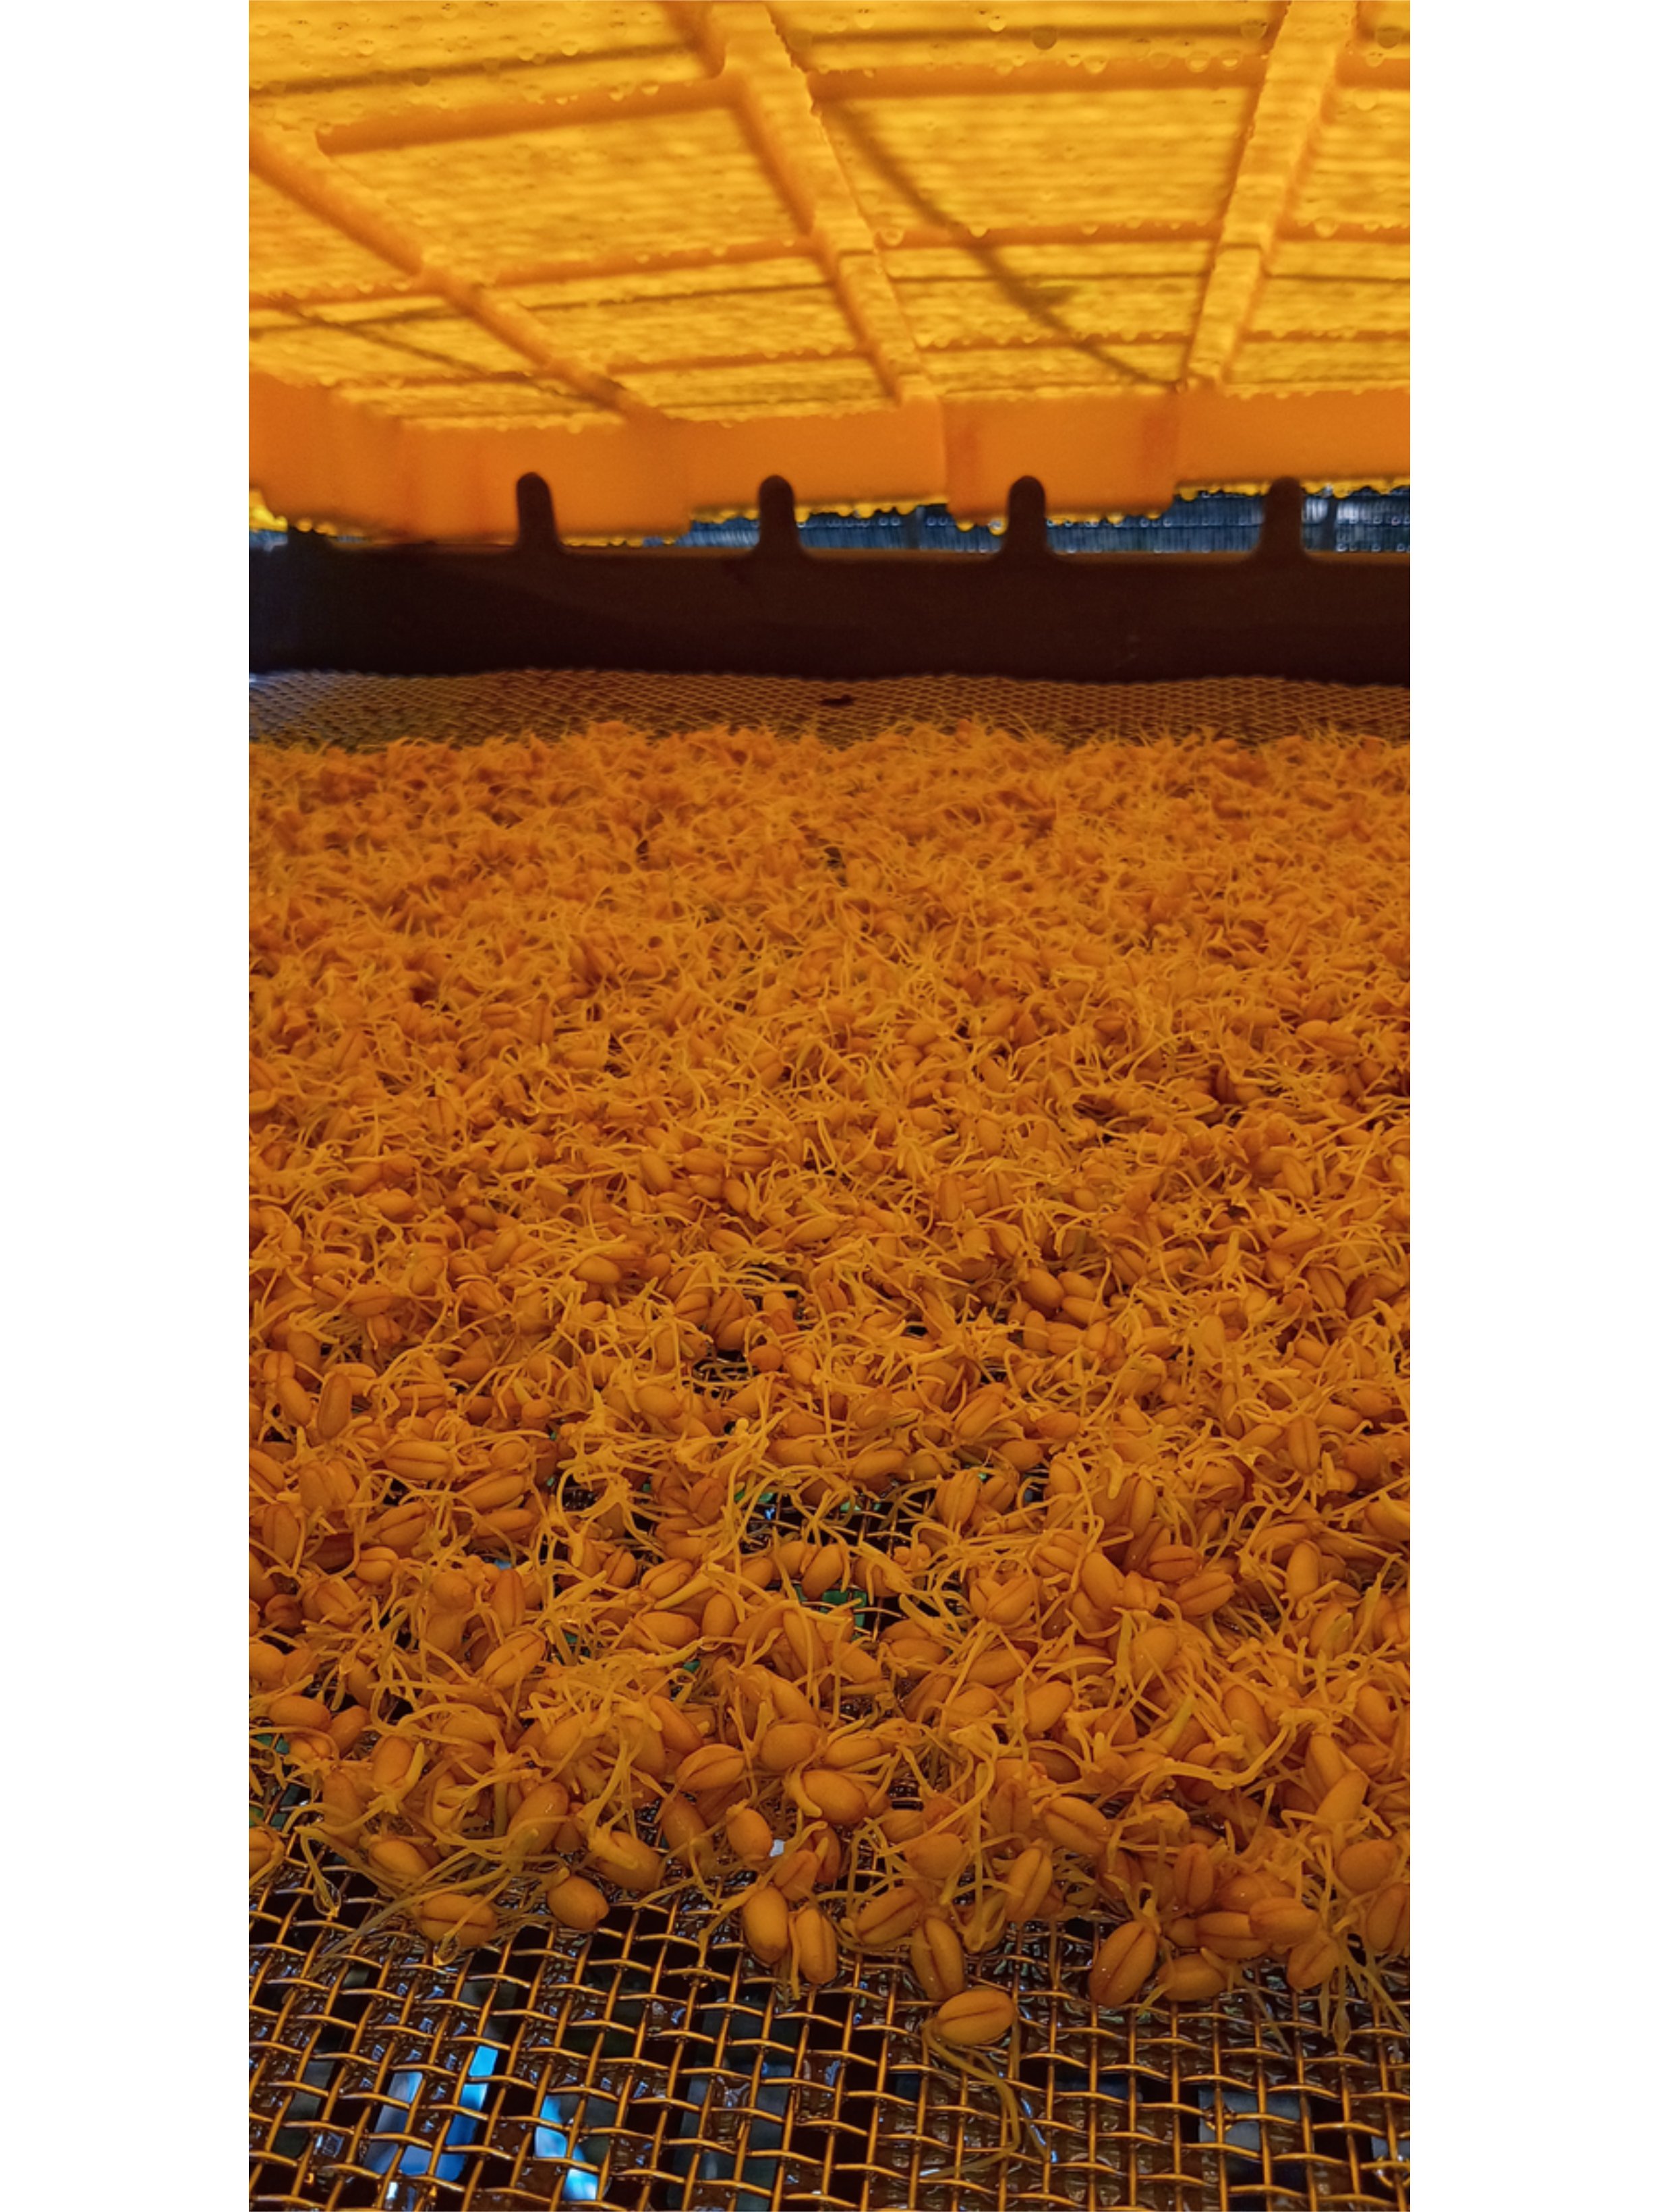
Peeking under the hood during blackout. The cover blocks direct light, but we still lift it briefly to water, check airflow, and make sure the roots are starting to grab.
Fancy? No.
Functional? So far, yes.
It created enough darkness while still leaving about one to two inches of headspace for air circulation. It also allowed easy access to the wheat for watering throughout the day.
When we say “blackout,” we are not trying to create totally blacked-out conditions. We are simply keeping direct light off the sprouts for about 24 hours so the roots can focus on spreading and anchoring before the shoots start greening up.
At this stage, we are watering three to four times a day. Until the automatic watering system is built, this is still very much a hand-rinse operation.
8. Our Very Unfancy Setup
If this is your first foray into the world of T-Bone’s Place, welcome.
We have been on this fodder journey for a hot little minute. We built a rack to hold and grow fodder in our semi-exposed greenhouse, and you can read about that here. You can also find similar bread trays on Amazon if you want to recreate something close to what we are doing. This is a paid affiliate link.
Eventually, we plan to add two additional racks, an automatic watering system, and a full wooden stand so the racks can be rotated, cleaned, and moved more easily.
The watering system is already in the works. We are currently playing with the idea of using an old deer feeder, a used fish tank, recycled caught water, and a drill pump. Stay tuned. 🤭😎
We are also thinking ahead to the colder months. If we want to keep this system running smoothly through winter, we will need to keep the tank water warm enough for the fodder to thrive, prevent the system from freezing, and make sure the fish tank does not freeze and bust.
We know we will need to cover the rack, watering system, and fish tank in a way that helps hold the greenhouse effect without blocking the light the fodder needs.
There will always be updates and tweaks in this system, but it will never be fancy or overly engineered. That is not really how we do things around here.
9. What We Are Watching For
There are a few key things we are watching for. Some are signs that we are on the right track. Others are definite warning signs.
Let’s start with the good ones.
While it is still in the jar phase:
• Plump, swollen berries
• Cleaner rinse water after the first rinse or two
• Fresh grain smell
• Tiny white root nubs or root tails showing
• Sprouting happening across most of the jar
During the 24-hour blackout phase:
• Roots spreading and beginning to anchor
• Pale shoots pushing upward
• Seed staying moist, fresh-smelling, and clean-draining
Post-blackout until harvest:
• Shoots greening up and standing taller
• Root web tightening into a stronger mat
• Fresh, grassy smell after each rinse
• Clean drainage with no soggy spots
• Growth looking even enough to harvest or feed soon
We are aiming for an optimal shoot height of around 6 inches, with roots around 2 to 2 1/2 inches long.
There are also signs that things are not going well, and some of those are universal no matter what stage the fodder is in. Sliminess, sour or yeasty smells, cloudy rinse water, a slick root mat, moldy patches, or berries that will not progress are all signs to pay attention to.
A few stage-specific warning signs include:
While it is still in the jar phase:
• Cloudy, funky rinse water
• Berries not swelling
• Few or no root tails
• Heavy wet clumping
Rack-specific warning signs:
• Seed sliding instead of anchoring
• Soggy spots or poor drainage
• Weak yellow shoots after light exposure
• Root mat turning smushy
10. What Could Go Wrong?
While we are learning, a lot can go wrong, but at the same time, so much is going right.
We are really pleased to report that we have achieved a chia-like root mat, which is exactly the kind of little root carpet we were hoping for.
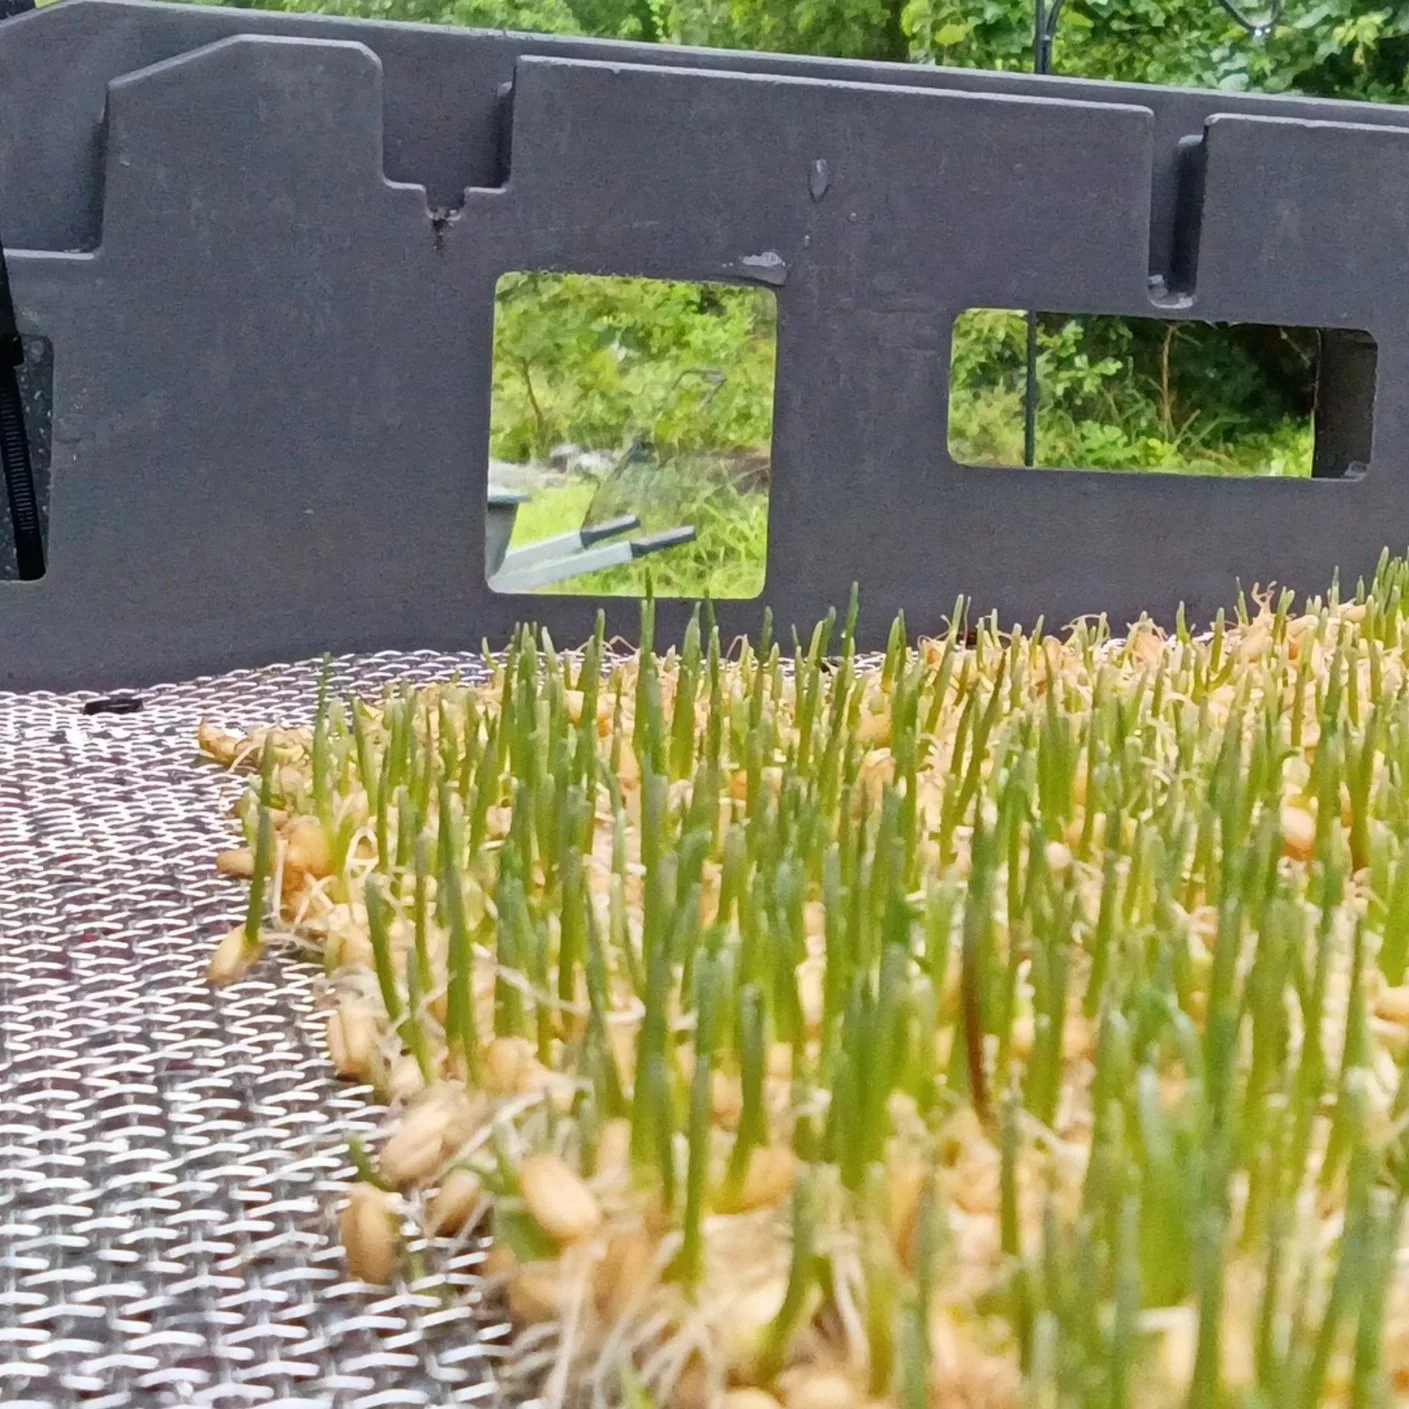
The “chia carpet” is turning into real green growth. This is what we were hoping to see.
However, we still have to keep a close eye on things.
We already noticed a significant difference in growth rate from one side of the tray to the other. Since we built the fodder rack with the screen as a removable tray inside the bread rack, I was able to carefully pop it out and turn it around.
I think the side closer to the center of the greenhouse gets less shade from the trees and more natural sun. If this causes uneven growth on a regular basis, we will rehang or relocate the rack to a spot in the greenhouse that receives more consistent light throughout the day with less interference from the old hardwoods shading the property.
We are also watching for issues that can be corrected on the fly.
Some problems are fix-it problems.
If one area is too thick and clumping, we can thin it out and spread it so it does not mold later. If one spot is too wet or too dry, or if the roots are a little slow to grip the screen, we can adjust airflow, moisture, blackout time, and drainage.
But if we get soured, yeasty-smelling berries, mold, slime, or rot?
Well, my friend, that batch is for the compost pit.
There is no saving it, especially if the goal is to feed rabbits. Rabbits have sensitive digestive systems, and this is not an area where I want to gamble.
11. What We Will Adjust Next Time
Fodder batches grow so quickly that it is easy to see what is working, what needs adjusting, and whether that adjustment actually helped.
This is completely different from the other side of the greenhouse, where trials and errors play out over a normal growing season. For instance, fodder can go from sprout to harvest in about seven days. Fresh pinto beans, on the other hand, take around 60ish days from sprouting to harvest in the greenhouse.
Needless to say, the learning curve is speedy.
One thing we are already working on is an auto-watering system. Right now, the plan is to recycle an old deer feeder that already has a programmed timer and solar charger, add a repurposed 15-gallon fish tank for caught water, and invert a misting sprinkler head using PEX line and push-to-connect fittings. 😎🤭
We will be adding a blog about that by the end of the week, so don’t forget to check back and follow us on Instagram.
12. The Next Real Test: Will the Rabbits Eat It?
We are about halfway through the process now. If all goes well, we should be lifting the mat and cutting it into portions to feed in another three to four short days.
I have no doubt that my Bits are going to absolutely ignore their pellets for this green, tender goodness.
But they still get the final vote.
Because at the end of the day, we can build the rack, soak the seed, rinse on schedule, baby the root mat, and get excited over every little green shoot.
The real test is simple:
Will the rabbits eat it?