Our Fodder Rack Rebuild: Failing Forward With a Bread Tray
Table of Contents
The Bread Tray Had a Life Before This
The Fodder Rack Plan
What Went Wrong the First Time
Why We Switched to Stainless Steel Mesh
What This Rebuild Cost Us
Adjusting the Slope
Next Step: From Seed to Feed

“Become so wrapped up in something that you forget to be afraid.”
— Lady Bird Johnson
A fitting thought for a project built from old trays, second chances, and one fantastic first fail.
That feels close to what we are doing here. We are not expert fodder growers. Keep reading and you will see our fantastic fail.
We do not know everything there is to know about growing fodder yet, but we are wrapped up enough in learning, repurposing, and trying that fear does not get to be the boss of this project.
The Bread Tray Had a Life Before This
When I bought those old bread trays, T-Bone’s Place was not even an itch in either of our brains yet.
Gene and I had not met. There was no fodder rack plan, no animals waiting on fresh green growth, and no bigger homestead story attached to those trays at all.
The greenhouse existed, but not like this. It was still in its first life, in another form, on my Momma’s farm.
And the bread trays were just three old trays sitting at a little junk-‘tique store on the side of the road somewhere between Cove, Arkansas and Mena. I was with my mom, and if I remember right, she and I paid about five dollars each for three of them.
I had no idea one of those trays would someday end up hanging in that greenhouse’s second life at T-Bone’s Place, taking a run at becoming our fodder rack.
These are those old bread racks you used to see the bread man carrying into the Piggly Wiggly on Tuesday. Remember those plastic ones? They also kind of resemble old commercial racks for glasses that you put in a dishwasher. I am not sure which one this was in its first life, but in its new life, it is going to be a fodder rack.
The Fodder Rack Plan
Now, this is not our first run at this fodder rack here at T-Bone’s Place. As we stated above, we had a magnificent failure when we tried the first time.
The basic concept is that we want to have three of these racks hanging one atop the other, with enough space between them for the fodder to grow in different stages in each rack. The water will cascade off the front edge of each rack and flow through each rack, washing over the roots of one set of fodder before moving down to the next.
For now, this is a gravity-fed fodder rack experiment. The bigger dream is to add a timed misting system, a catch tank, a small solar pump, and eventually goldfish, turning the whole thing into a small aquaponic-style system.
What Went Wrong the First Time
We used window screening on our initial round, and we discovered a couple of fatal flaws with that screening so fast.
Right away, it gave way under the weight of the wet wheat berries. The problem with this was that it caused them all to pool in the center. 🥴 The next issue was that the hole diameter was too small for the roots to grow through, even if the seeds had not already turned into a big, tangled mess.
All of this created a conglomeration of seed clutter in the center of the original fodder rack. That prevented water from flowing through, which meant we grew mold instead of the intended fodder.
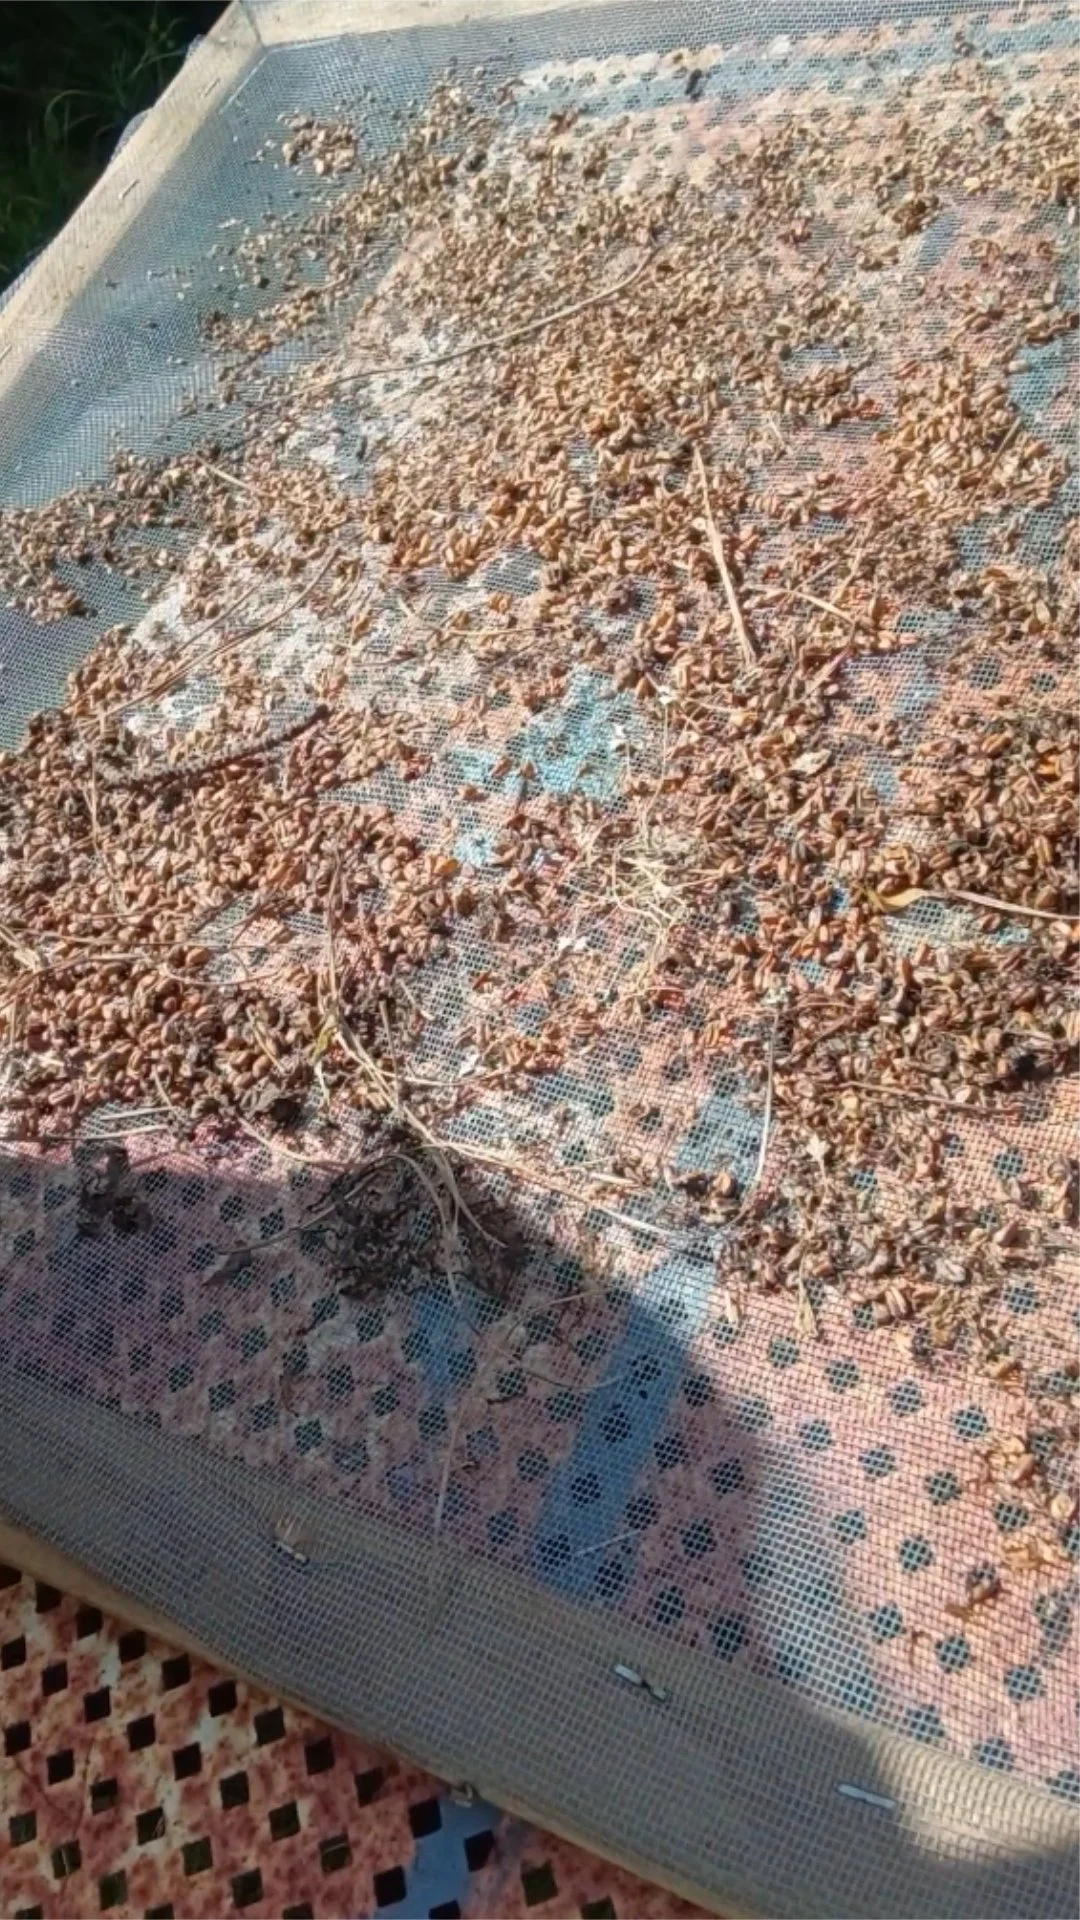
Window Screen Fodder Rack Fail
Seed clutter, standing water, and not the chia carpet we had in mind.
We knew we needed to punt and go back to the proverbial drawing board.
Who are we kidding? We do not draw plans. We do not even draw stick men.
But we did need to try again.
Why We Switched to Stainless Steel Mesh
I went on a search for different types of mesh, and there are all kinds.
Aluminum mesh is softer than stainless steel, more likely to bend and dent, and may wear out faster in this kind of wet setup.
Fiberglass screen mesh is basically window screen. It was too fine for the roots to go through, not strong enough to prevent sagging, and we already tried this and failed miserably.
Plastic or polypropylene mesh is lightweight and rust-proof, but it might sag, and I was not fully comfortable with the food-safe question.
Nylon mesh is fine and flexible, but flexible is not always your friend when you are trying to support wet seed. It would likely sag too.
Seed sprouting screen was another option, but that would mean purchasing something made specifically for this purpose instead of trying to use what we had and make something from little or nothing.
We opted for stainless steel.
We chose it because it had the hole size we needed for the berries. The hole diameter is approximately 2.5 mm, and the wheat berries we will be sprouting are approximately 2 to 4 mm wide.
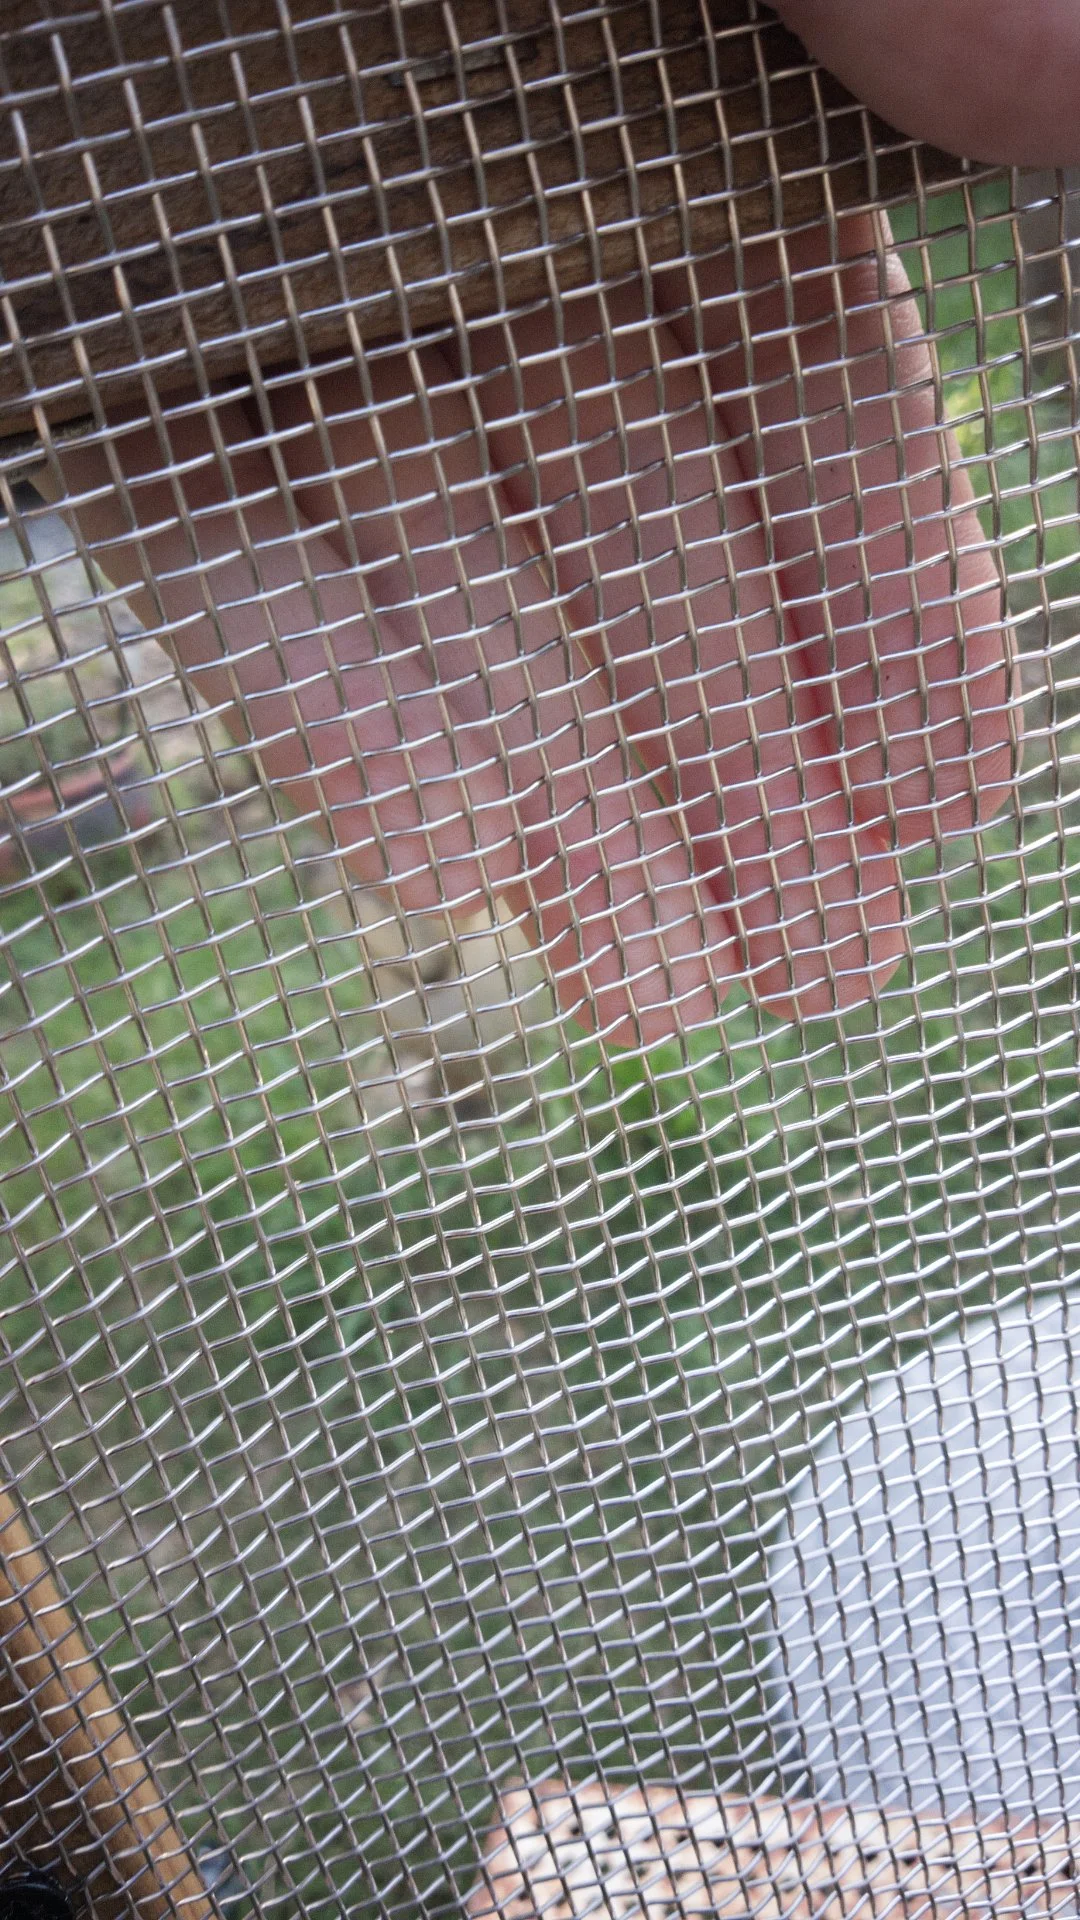
Stainless Steel Mesh for the Fodder Rack
A closer look at the mesh we chose for drainage, support, and root growth.
Our berries should not fall through, but the roots should still have plenty of room to grow through the mesh, hopefully forming that little chia carpet of green growth we were aiming for.
What This Rebuild Cost Us
So far, our total investment in this fodder rack experiment is $16.99.
The bread tray was already here.
The greenhouse was already here in its second life.
The rack idea came from trying to use what we had before buying our way into a system we do not even know will work for us yet.
The only thing we bought for this second attempt was a set of two 12-by-24-inch pieces of stainless steel mesh for $16.99.
I secured the two stainless steel mesh pieces with screws and then added a center support piece.
Adjusting the Slope
I then took the completed frame into the greenhouse and raised the rear of the fodder rack.
In the original version, the water just stood in the center of the seeds. It never ran off because the slope of the rack was not sufficient. There needs to be run-off at the front of the rack to help protect the seeds and roots from drowning during excessive rains, since they will be in an open-air greenhouse, for all intents and purposes.
This increase in height at the rear should give the rack enough slope to accomplish this while not allowing the berries to get swooshed off at the slightest swash of rain. At least, that is the hope.
Next Step: From Seed to Feed
Next step is to start sprouting.
I had a really nice seed sprouting jar. Had being the operative word. We are sitting here trying to remember how it got broken, and I can envision it falling in my mind’s eye. UGH. We were so bummed.
I got these stainless steel lids that go on my half-gallon jars. They have an extendable stand to prop the jars at the correct angle for sprouting during the draining stages. They were really inexpensive, two for under $8.
Let us know in the comments if you want us to do a part two, and we will show everyone what the actual growing stages look like from seed to feed. 🌰🌱🌻